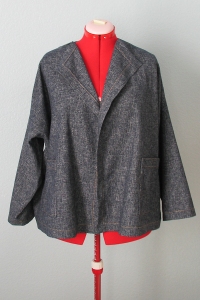
Pendleton 1949 Jacket

Pendleton Woolen Mills has issued a sewing pattern based on their iconic “49’er” jacket.

55919049_10157193337818343_5398445038311047168_nThis is the description from the back of the envelope: The Pendleton 1949 Jacket is based on the original Pendleton ’49er. It is an unstructured, unlined jacket with a straight hem. Button front has a French Placket and peaked lapels. Flanged shoulders allow ease of movement. Long sleeves are finished with single-button rounded cuffs. Two open patch pockets can be cut on the bias, matched to grain or omitted.

In the past, I’ve used camp-style shirt patterns to try to replicate this style, just doing my best to copy that shoulder flange that is one of the key features.

This was a very nostalgic project for me, because I have very clear memories of my mother wearing a jacket like this. Hers was a muted pale green, and was probably a knock-off. I wasn’t too keen on mother/daughter outfits back in the day, but now I’m happy that I can wear something like she did.

Pendleton 1949aMine is a screaming purple, though, because I have had this wool crepe in the stash for a long, long time. I ordered it because I knew that it was the good stuff…and was surprised when it arrived and was such a vivid color. I was never going to make it into anything else, so it became the fabric for a test version of this pattern.

I’m really happy to have this pattern and don’t want to be overly critical. After all, Pendleton is a fabric mill, not a pattern company. But I do want to mention a few things that were lacking in the pattern as a heads up for others that might want to make it.

Fabric layouts – the back of the envelope reminds you that you need extra to match plaids. I was surprised, though, that the layout diagrams for 60″ fabric has the sleeve cut out crossways. If your plaid is uneven, I don’t think that would work.

That instructions for that important shoulder flange were not very clear, and even though I can’t figure out a different way to make them, I’m still not sure that I got it right. The tissue has edgestitching marked for the edge of the flange, but it doesn’t seem to be complete or meet up where it should. I am curious to find out if others see this same omission. It could very well be that I just missed some vital info somewhere.

Pendleton 1949bSome other markings or instructions seem to be missing and would be helpful. There was no match point on the sleeve cap for the shoulder seam, for instance. And there was some topstitching indicated in the diagrams that was never mentioned in the instructions. The diagram showing the topstitching on the lapel looked wrong, to me. Button size was not given. Since some people will be sewing to replicate the real thing, button size would be nice to know.

However, this was not difficult at all to sew, except for wondering about the construction of the shoulder flange. And they gave separate pattern pieces for interfacing, which is a nice touch.

My fabric was a touch too beefy for the continuous lap on the sleeve placket, especially where the placket and cuff come together. So my greatest sewing challenge was due to selecting the wrong fabric. I do love the very heavy drape of the crepe, though.

Alterations: I increased the width of the back by making the uptake of the pleats larger. (the back is pleated into a yoke at each shoulder blade) I also shortened the sleeves 1″, and could have made them even a little shorter. Next time I will narrow the shoulders a little and think that will help set the flange. It gapes a little if I don’t maintain good posture. Meanwhile, some shoulder pads will help and there is plenty of time to put them in before cold weather gets here.

I followed the instructions and am glad I did. I would have done a burrito assembly for the yoke. Their method, although it required a little hand stitching, prevents any boo-boos around the neck edge and I was glad to have that come out perfect. I sneaked in some understitching that was not called for, but makes for a nicer finish around the back of the collar and at the front edges. I also did the topstitching on the lapel and collar the way I thought it should be, not the way they showed in the diagram.

Pendleton 1949cI ended up loving the color made up in this style, and think I will wear it a lot once the weather is right. It’s still nearly 100 in the afternoons here, but cooler temperatures will come. Eventually I’d like to buy the correct fabric from Pendleton in a lovely plaid and make another one.

The sleeve looks twisted in this photo but that’s just the result of taking an awkward mirror selfie.

My pattern came with a fun booklet highlighting styles of the 1900s by decade. If you’re interested in the pattern, here’s a link: 1949 Jacket Pattern


Ottobre Crispy Texture

Otto Crispy Texture 1On an Ottobre kick. My MO for this project was to pick a stash fabric that I really wanted to make up – in this case a coarsely woven ikat – and pick a pattern that would make the best use of it.

For the ikat, I was reaching for my usual minimalist-type jacket design, Anything But Ordinary. And while I have made that pattern many times and certainly appreciate the aesthetic, I’ve been wanting a little more refinement in the fit of the shoulders. This pattern from the 2-2019 issue had the bones to test as a substitute. The original in the magazine is a longer zip-front linen jacket with patch pockets and a drawstring split hem in the back, but it looked like it would be easy to adapt to a button-front, and shorten up.

Attractive features that made me want to try it as an ABO substitute: shoulder slope that is a closer match to my own, shoulder darts for additional fit, and an armscye and sleeve cap that differ from back to front.

This should have all been easy-peasy, but I have been really, really easy to confuse lately and got the center front mixed up with the front fold. At least I thought I did. I might have been confused about that, too.

Anyway, in order to fix my mistake, I added an extra strip of the fabric border on both sides of the front and took the opportunity to make in-seam buttonholes.

Otto Crispy Texture 2Not crazy about the buttons. JoAnns used to have a pretty good selection, but not any more. For shirts, that’s no problem. I go to the thrift store and for $1 buy a shirt with buttons I like. It’s not so easy with jacket buttons. So I bought some plain white ones at JA, even though they were shiny. Before sewing them on, I scuffed them up with sandpaper to remove the shine, because it just didn’t go well with the rustic weave. They are still too white, and one day when I have a better button selection I will replace them.

Other details about the construction…the ikat is a little loosely woven and I stabilized it by underlining with cotton batiste. The jacket still has a nice soft feel, but just a little more structure than it would have had with out the extra support. Narrowed the sleeve at the wrist.

Next time I will get the ABO out to copy the center front and neck opening onto this pattern, so I can get the front right and also copy the very cute collar it has. The Otto original was sized to be outerwear, so I might also size it down just a little still keeping it loose.

All in all I’m really pleased. I like the fit so much better and am really pleased to be able to refine a style that I use so much.

This will work just fine with a white top and my blue jeans or natural linen pants. The color is a little strong for me, but it won’t be a total wardrobe outlier.

Vogue 8089

The endless chain is progressing. After two tops and a cardigan, I bought a pair of jeans. I ended up getting mom jeans from Lee because I do like a really relaxed fit.

The next item is a topper from V 8089, an old out of print Sandra Betzina pattern from Vogue. I found it at Half Price Books years ago and it has been in the “make soon” pile ever since. The fabric is a double gauze ticked with tiny squares: light blue on dark on one side, dark on light on the other. This is the second thing I’ve made with double gauze, and it is both nice to sew and to wear. It rumples up in a charming way when washed.

V8089

The artwork on the front of the Vogue pattern is really uninspiring. What was attractive to me is that there was one of those diagonal “French” bust darts incorporated into a kimono-ish type style. The pattern description makes reference to a unique lining technique that I did not use, but may try on another simple jacket sometime. What I don’t see in the photo, line drawing, or description is that there are pattern pieces and instructions for some nifty trapezoidal double welt pockets in the pattern. Hidden treasures.

There are the aforementioned bust darts plus a couple of back vertical darts that keep this boxy shape from being really, really boxy. The sleeve cap was unexpectedly high, so there is the potential there for a fitted, not extended, shoulder. Shoulder pads were called for but I left them out and the result is not too sloppy. I flat felled all the seams except the armscye. The sleeve hem is faced, so the contrast side shows when they are turned up.

This will be a great little casual air-conditioner fighter in a few months, but I doubt I will make it up exactly this way again. Instead, I plan on turning the body with those diagonal darts into a button front top, and will probably size down when I do. I also want to use the cool welt pocket sometime, as well as the lining technique.

endless chain 2

Here’s the state of the endless chain so far. Next item TBA! The new Ottobre Woman has arrived, and there are several things in it I want to make. Now to consider what would work under this little jacket.

Anything But Ordinary Jacket

When browsing Farmhouse Fabrics I found a listing for handkerchief linen with several different co-ordinating stripes of white and natural. That is one of my favorite color combinations and I knew I wanted to make something that would use two of them for some subtle low-contrast contrast. I also needed a lightweight summer jacket for those air conditioned places.

ABO stripe

I bought enough fabric so that I could line whatever pattern I chose to the edge. That in effect makes a reversible fabric, and two layers of handkerchief linen is a good weight for a summer jacket. The Anything But Ordinary jacket from Cutting Line Designs is a nice simple design that goes together easily and made handling the two layers almost trouble free.

Cutting: I eliminated the center back seam and shortened the sleeves to bracelet length. The two layers were cut exactly the same, except that the collar was cut only from the stripe that was being used as the contrast side.

Construction order:

  1. Sew the shoulder and side seams of the inner and outer bodies separately.
  2. Construct the collar
  3. Attach the collar by sandwiching it between the inner and outer body layers and stitching the neckline seam.
  4. Right sides together, stitch all around the outer edges of the jacket: center fronts and hems. Turn right side out through an armhole.
  5. Construct the inner and outer sleeves.
  6. Right sides together, stitch the sleeve hem edge. Turn.
  7. Press under the seam allowance of the inner sleeve cap.
  8. Stitch the outer sleeve cap to both layers of the body.
  9. Attach the inner sleeve cap by hand.
  10. I decided to stitch in the ditch at the side seams through all the layers to give the hint of structure I would have gotten from underlining.

In all cases, I trimmed the seam allowances so the inner layer was not as wide as the outer layer. And when sewing the outside edges, I skootched the inside layer away from the edge so that the seam allowance for the inside was only 3/8 of an inch, while the outside layer was 5/8. It’s a bad look when your lining is too short and pulls on the outer layer.

Here is how the collar and the sleeve cuff look, showing the subtle contrast between the layers. I will probably always wear the sleeves turned up to 3/4 length.


My pressing is not perfect, but this piece will probably never be pressed again! Rumpled linen suits me fine.

When trying on the jacket and deciding on the buttons, I liked the look all buttoned up to the neck, even though realistically I would not wear a jacket that way. But I think I will make this pattern again soon as a loose shirt and make it button all the way up.

Happy summer sewing to any readers!


Tabula Rasa Jacket 2

Here is the “nice” version of the Tabula Rasa.

Fabric – wool crepe that I bought a very very long time ago. This blueish grayish color is a favorite neutral, but it’s not always easy to find. This version is lined; I followed the instructions for lining and they are just fine as long as you don’t mind hand stitching. I have yet to bag a jacket lining…one day…. This version does not have any closure. Bound buttonholes seemed too tailored for this style, but I didn’t want standard machine buttonholes, either. No prob, since a fastener-free kimono front works fine.

Again, not a good photo. I’m so sorry not to be able to get an informative picture of this jacket for you. I think you can see the part that I am happiest with, though. That’s the lack of excess fabric through the shoulder and underarm. For an art-to-wear type jacket, that is an outstanding feature.

Fit for Art 2

Here it is with the brightness turned way up…maybe it will show a little more what I mean.

Fit for Art bright

No long navel-gazing, although this is sure to be my last post for 2014. I didn’t sew as much because I didn’t need much! The stash is down to a very comfortable level. I experimented with some lagenlookish styles but they didn’t take. There you have it, my sewing year in review.

Wishing you all a happy and peaceful 2015!

tabula rasa jacket

The Tabula Rasa is from indie pattern company Fit For Art. As the name of the pattern indicates, the jacket is meant to be a blank slate for your piecing, color blocking, or embellishment. Likewise, the name of the company shows their concern about fit. Lots of art to wear jacket patterns are just big and boxy, I guess that you are supposed to ignore that and just look at the embellishments. This one, while still a relaxed fit, has eliminated much excess fabric and provided bust shaping. Details on that a little later.

We had a little cold snap here that made me realize I had a few tops that didn’t really work with my coats. A cardigan-like jacket with a warm lining would fill the bill. First I went to my Ottobre and Burda magazine binders, but didn’t find exactly what I was looking for. I’m glad I remembered this pattern that I’ve kind of had my eye on for a few years. It has a folkloric-type feel to the design that I like – a little bit like a kimono but with a skosh more fit.

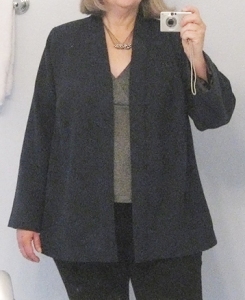
Lightened, but you still can't see anything. Sorry.
Lightened, but you still can’t see anything. Sorry.

The illustration on the pattern doesn’t do this design justice. That’s really too bad. The jacket is designed with no side seams. There is a side panel that, combined with the uniquely-shaped armscye, provides vertical princess-like lines front and back. A band finishes the center front and neckline, your choice whether to add a button or three or not.

On the topic of fit – you can tell that a nicely-fitted jacket is the designer’s goal here. There are two different front pieces included in the pattern – one for A/B busts, and one for C/D that has an extra set of bust darts rather than a single larger dart. There are also two different side panels – straight sides for narrow hips, and an angled side for full hips or if you want a swingier jacket. Horizontal balance lines are also included on the pattern. The intention is that you will first make an actual muslin muslin with the balance lines marked to aid in evaluating the fit and where adjustments are necessary. The very complete instructions (a 15-page booklet) advise making a real muslin with the balance lines, and then a wearable muslin in a fabric similar to the artsy fabric it assumes will be used for the final version. In addition to some fitting advice included in the booklet, there is an eleven-page document available on the website with instructions on how to address 16 common fit issues. Lining, interfacing, and seam finishes are all discussed in the instruction book.

Unlike other arty jackets, this one does not have extended shoulders. That’s one reason that the fit seems relatively trim. Also, a lot of fabric that is usually bunched up under the arm has been eliminated.

I skipped to the wearable muslin, but marked my balance lines in soap (washable jacket). I used one size up from the size recommended for my bust measurement, because I wanted a jacket that would fit over some other layers. I went ahead and made a forward shoulder adjustment before cutting out, and added an inch to the length. I had to cut an inch and a half off the sleeves. They were long!

The jacket went together very quickly. Took me about four hours to complete, and I am not Speedy McSeamstress by any means. It was fun to sew, too. The unique sleeve and lack of side seams mean that the construction is different, so I followed the steps in the booklet. They include lots of other specifics that are often left out, like which side to have on top when stitching and which way to press the seams. My only nit-picky point on the instructions is that there must be some tricks to making the finishing of the band a little easier. I’ll have to search through my Cutting Line patterns and see if there are some band finishing instructions that can be borrowed.

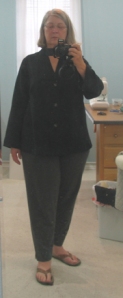
Still doesn't tell you anything except that it needs to be longer.
Still doesn’t tell you anything except that it needs to be longer.

So…wearable muslin is done and I’m really pleased. Sorry the photos don’t tell much since it’s black. My only fit issue is that the upper back is a little wide, so I’ll consult the fitting document to see how they recommend adjusting that. I’ll also make the next one two and a half inches longer than designed. Some wool crepe is earmarked for the nice version, once I get some nice lining for it. I dabbled with embellishments for a little while and decided that they aren’t for me. I enjoy doing the work, but didn’t like wearing the garments. So plain wool crepe it is. Maybe with some topstitching to emphasize the seams.

You can probably tell that I like this jacket, since I wrote so darn much about it! It could be adapted to a nice tunic, too.

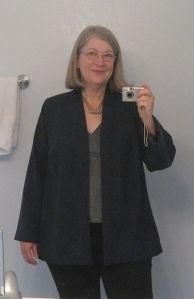
ready for fall

photo has been enhanced, but it's still black and hard to see
photo has been enhanced, but it’s still black and hard to see

Ready for cooler weather with 3 jackets!

First up, yet another By Popular Demand jeanish-type jacket. This one was lengthened a lot, and a little shaping was added to the sides. I’m coming to realize that my back-to-waist length must be at least 2 inches longer than this pattern line is designed for.

This is a TNT pattern, so no other refinements were needed. I did change the construction a bit in order to include an underlining that also hides the seam allowances, a variation on the stitch & flip technique.

Fabric – cotton pique. I really thought it would be nice and stable to work with. Surprise! Wrong! This stuff grew on every edge. I’ve never used pique before, so I’m not sure if that is characteristic of the weave or if I just ended up with a very “special” piece.CLD BPD black 2

Underlining – printed silk charmeuse that I bought long ago for another project that never made it to the cutting table. It works great for this little jacket, though. I’m glad to finally have it out of the stash. Stash is like compost – it fertilizes your mojo, but it’s better if you turn it over once in awhile.

I used gunmetal grey snaps from Snap Source for this jacket. These were the last of a large-ish order I placed many years back. Time to get some more as they are nice to have on hand.

CLD OTMThis one is another Cutting Line design called Of the Moment. I had muslined this jacket before and thought it looked sloppy on me, so I put it away. I really wanted to make the style work, though, so made it the first experiment in developing blocks with different shoulder fits. The original OTM design has a sleeve seam, but without any shaping. It’s essentially a straight kimono/dolman shoulder and sleeve.

I overlaid the Paco Peralta asian jacket that fits me well and altered the OTM shoulder & sleeve to match it. I’m MUCH happier with the fit of my altered version – this one now can move into the win column! Again, the pattern was lengthened at least 2 inches. For this version, I used two left fronts (as designed, the pattern has more drape to the right front, less on the left). Topstitching was done with the machine’s triple stitch using rusty orange thread, like on jeans. It only shows when you view the jacket close up, but does add a nice little detail.

The material came from Fabricker and had the nice quality of being the weight of a denim, but soft and drapey – right in the Goldilocks zone for this style. This pattern would really show off double-sided fabric, and I hope to find some to make it again.

An unusual thing about the OTM pattern is that the neck facing is the most important piece! How often does that happen? If it becomes distorted or is not sewn accurately, the mitered effect of the turnback lapel is ruined. The rest of the jacket is straight and very easy sewing.

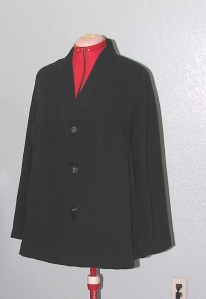
V7975_finishedThen there is this one, the snakebit project. Finally finished after more than a year. It started life as V8804, but ended up V7975. From pattern errors to notions sourcing difficulties to design indecision to seamstress mistakes to inevitable compromise, this one dragged me through it all. Here it is – quilted lining, chain at hem, not perfect but complete at long last.

I cursed this thing so much that the negativity permeates the fabric like cigarette smoke. How do you exorcise evil spirits from a garment so that it is safe to wear? Seriously, what do you do when you are sick of something by the time you finish it?

A Cute Angle

It seems like Cutting Line Designs patterns are being issued more frequently these days. That’s good news, because I usually like them very much. But now it is easy to get behind with trying them out. And since they are expensive patterns, we can’t have them just piling up on the corner of the cutting table!

A Cute Angle

A Cute Angle is one of the ones I hadn’t made yet. There are two patterns in the envelope: One is a long sleeve blouse with hidden button closure, and the other is an asymmetrical jacket. I was curious about how the blouse differed from some similar recent offerings. The Artist In Motion top looks similar, and I wondered if the front closure was the only difference. A quick muslin later, I had my answer. The ACA top is cut slimmer – there is much less volume than the AIM top. It also seemed like the shoulder is squarer. I didn’t care for the way I looked in it, so I started thinking about the jacket.

The asymmetrical design is kind of “out there” for me. A wrap or an off-center line of buttons is about as far as I have gone. But this one seems like it could hang with a lagenlook collection, so it needed to be tried.

I’d also been wanting to order from the linen specialty shop, fabrics-store.com. So I picked out a pretty blue and ordered yardage plus some swatches of other colors and weights to get an idea of their inventory. The mid-weight (IL019) linen that I bought seems like good quality for the price. Beware, though, they send lots of e-mails. Many of these are about sales and special prices (good), but they seem to come every other day (bad). I’ll give them another week to see if I have to send them to the spam folder or not.

CLD ACA frontHere’s the finished jacket. I like it a lot – and wish I had lengthened it just a little bit more. You don’t want to go making these really distinctive styles multiple times. When the hemline is all over the place, it’s hard to know where to take your length measurements.

In contrast to the little top, the jacket has a relaxed but neat shoulder/armscye/sleeve draft. If I do make it again, the shoulder could be just a tad narrower.

Maybe the lapels could be made smaller and I could do it again as a button-up top. As designed, there’s a single button and you have the option of making a buttonhole or a loop. I went with the loop and a big vintage mother of pearl button.

CLD ACA backYou can’t see it very well here, but there’s a little pleat running the length of the center back that is very cute.

One of the good things about sewing is that we get to define our own goalposts, and move them whenever we like. Much as I like the CLD patterns, the ones with the very square shoulders look pretty sloppy on me. Shoulder pads would fix that, but that’s not going to happen for everyday wear. It occurs to me that what I need are three different blocks so I can refine the fit of the shoulder and sleeves, and use them to modify the patterns. A dolman block, a drop-shoulder block, and a slightly-extended shoulder block ought to cover my needs for these relaxed styles.

Paco Peralta’s dolman draft fit me beautifully, so I’ll use it for the dolman styles.

For the slightly-extended shoulder, I can use this jacket (with the shoulder narrowed a bit) or the jacket from another CLD pattern, Pure and Simple (it’s out of print).

That just leaves the drop-shoulder, and I may look to Burda for a solution. Will need to examine some of the other CLD patterns to compare the shaping of the sleeve caps for styles that fall into this category.

So, a little project is born – I need to prove to myself that I can make those pattern modifications and that they will turn out the way I want them to. I’ll report on the results.

The jacket in this post was made on this machine…

sm_Raquel

the leopard, she cannot change her spots

needs sleeves, hems, and pockets

Last year around this time I was all fired up about the new Claire Shaeffer V8804, another one of her Chanel-type jackets, complete with the quilted lining and many fussy construction details that I wanted to learn. I was also fired up to emulate the great Ann Rowley, and purposefully gather all my materials and make all my design decisions before starting on the jacket, thread tracing and copying all the other fine techniques Ann uses all the time. This is contrary to my usual way of working in which I kind of make it up as I go along.

I do give myself a pat on the back for having tried to do things another way, but it just didn’t work for me.

For one thing, I had trouble assembling all materials and trim, because I had specific things in mind that I just could not find. (This is a big reason that I don’t like shopping. I can never find what I want.) I spent weeks just trying to source things, with my mojo fading before I even threaded up the machine. Then the compromises began, and that killed off my remaining motivation. I’ll fess up to the compromises when I show the finished jacket.

I usually don’t have UFOs because I am strict with myself about finishing project A before moving on to project B. Finishing is the most tedious process, and it is much more fun to start something new. So I have to make myself finish. In this case, I was so frustrated that I cut myself some slack and put it all in a box where it sat reproaching me all through the spring and summer.

Now that cooler weather is only a couple of months off, I decided to do whatever it takes to get this thing finished. The trim has been applied and the sleeves are all ready to insert. I have chain to apply to the hem. A couple more sessions and it should be done.

And then I’ll go back to my usual comfortable way of working. Not that I’ll never attempt a labor-intensive project again, but I will have to gain some perspective on this one first.

embrace your spots and relax


Cutting Line Designs – A New Dimension

A New Dimension is the latest pattern from Cutting Line Designs. I started looking forward to this pattern when I first saw the samples. In the thread devoted to CLD patterns on Stitcher’s Guild, Louise let us know when the patterns were going to ship, so I was able to shop for fabric and have it all pre-washed in time to cut out the day after the pattern showed up in the mailbox.

The pattern

Both views have shoulder princess seams front and back. Dolman sleeves, swingy flare at the hem. The shorter version has a deep v neckline with a collar band and a tab button closure – good opportunity to use a showstopper button. The longer version has a collar with an interesting origami fold and optional pockets in the side front seams.

For this line of patterns, I like fabrics with interesting textures. Those can sometimes be hard to find. During my fabric shopping for AND, I found a light-weight cotton with a woven-in plaid pattern that was further texturized with an embroidered design. It was the right weight for a breezy dress with lots of gathers, but not exactly right for a jacket. However, Super Textiles also had a selection of brightly-colored cotton batistes. The two fabrics used together would be weighty enough for the design and would also give me the opportunity to hide all my seams in the underlining. I thought of the colors available, I’d like the fuschia combined with the navy fashion fabric.

I also planned from the start to make a bound buttonhole because I still don’t have a good buttonhole machine, and toyed with the idea of using the fuchsia for the buttonhole lips. Then I thought maybe I’d also pipe a seam or two with the fuchsia. Thank goodness for photo software that lets us try out our ideas before we actually spend precious time executing them.


YUCK
YUCK

I didn’t like any of those options, not even example “a” with the barely-visible accent buttonhole. So I just proceeded with the idea of making an unembellished jacket.

CLD ANDSingle layer cutting helped me match up the plaid texture. I didn’t bother trying to match the embroidery as well.

This went together pretty quickly, and since there is plenty of flare at the hemline, it didn’t require much in the way of alterations, either. I did a forward shoulder and lengthened it 3 whole inches to make it the length shown in the illustration. If I had made it the original length, it would have reached my waist. Maybe. It is a very cropped jacket. If you are average height or above, be sure to check the length before you cut, because there is only 7/8 inch allowed for hem, and if you want extra length you’re not going to pick up much there.

The buttonhole tab has a seam running down the center of the back of the tab, rather than seams on the 3 sides. This eliminates a lot of bulk in the corners and gives you a tidy tab. I wanted to have a bound buttonhole, and wanted the seam to fall exactly in back of the opening – so that the folded-under seam allowances would form the back buttonhole opening. That required re-engineering the tab, and was the most laborious design change I made.

CLD AND buttonI had a huge vintage mother-of-pearl button that I attached using rouleaux made from the fashion fabric. The rouleau? rouleaux?  was threaded through the buttonholes and knotted on the front, stitched to the jacket on the back. The ends were cut close to the knot and will be allowed to fray. Maybe I should just say “bias tubes” and not try to get all fancy with French.

The fuschia will be our little secret, OK?
The fuchsia will be our little secret, OK?

And here’s a photo showing the shape of the collar and tab against the BRIGHT underlining.

I like this pattern and look forward to making the long version.